A special experience
When talking about medieval pigments, the blue ultramarine, or lapis lazuli, is perhaps the most familiar pigment to most of us. It is a beautiful shade of blue that captured and continues to capture the imagination.
In this post, I want to focus mainly on painting with lapis lazuli, the medieval ultramarine.
It strikes me that there is a lot to be found about this colour and preparing it but not about painting with it. I always thought it was priceless but that turns out not to be so. There are different grades of ultramarine for sale in which I have noticed they are affordable and produce beautiful results. On top of that, you don’t need much paint for relative small illuminations. During the Middle Ages, they often first applied a layer azurite, a copper based pigment. Then they worked over it with the much more expensive ultramarine.
I
In the Middle Ages, people did first apply a layer of azurite, (a copper compound). Then they worked over it with the much more expensive ultramarine. In this way, they saved a layer of expensive ultramarine. I will leave this technique out of this post. I hope to return to it later.
For the sake of precision, I will now speak only of ultramarine ‘ ultra mare’; from the sea and here I mean the classic ultramarine blue made from the stone lapis lazuli.
A few general things about ultramarine.
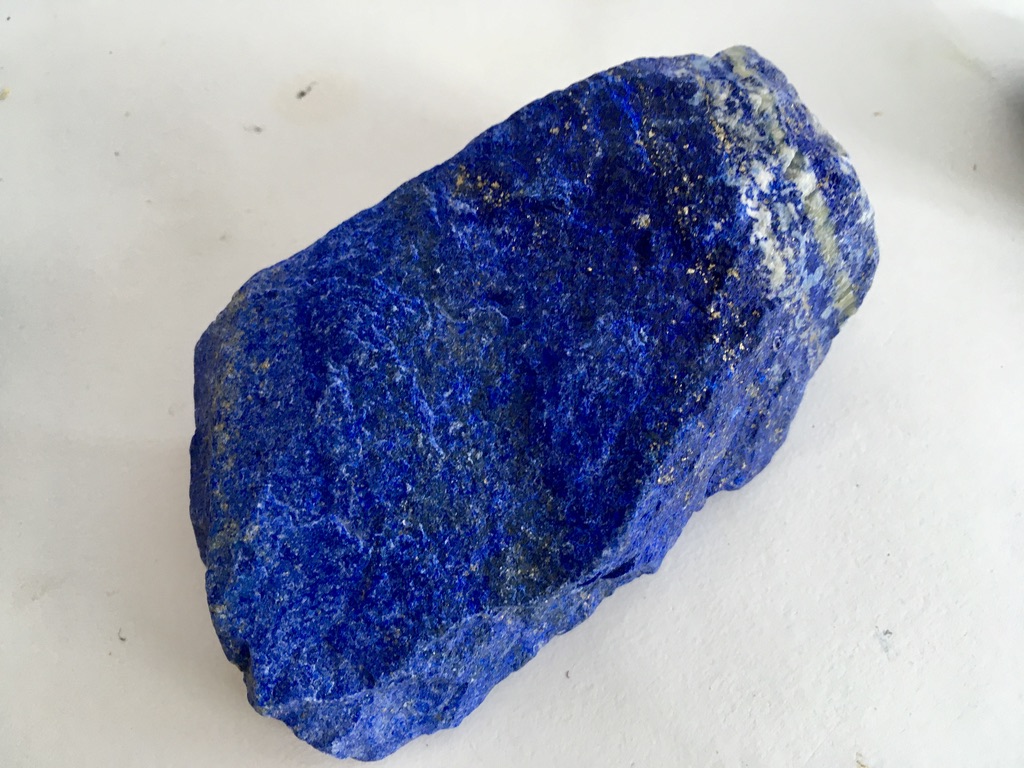
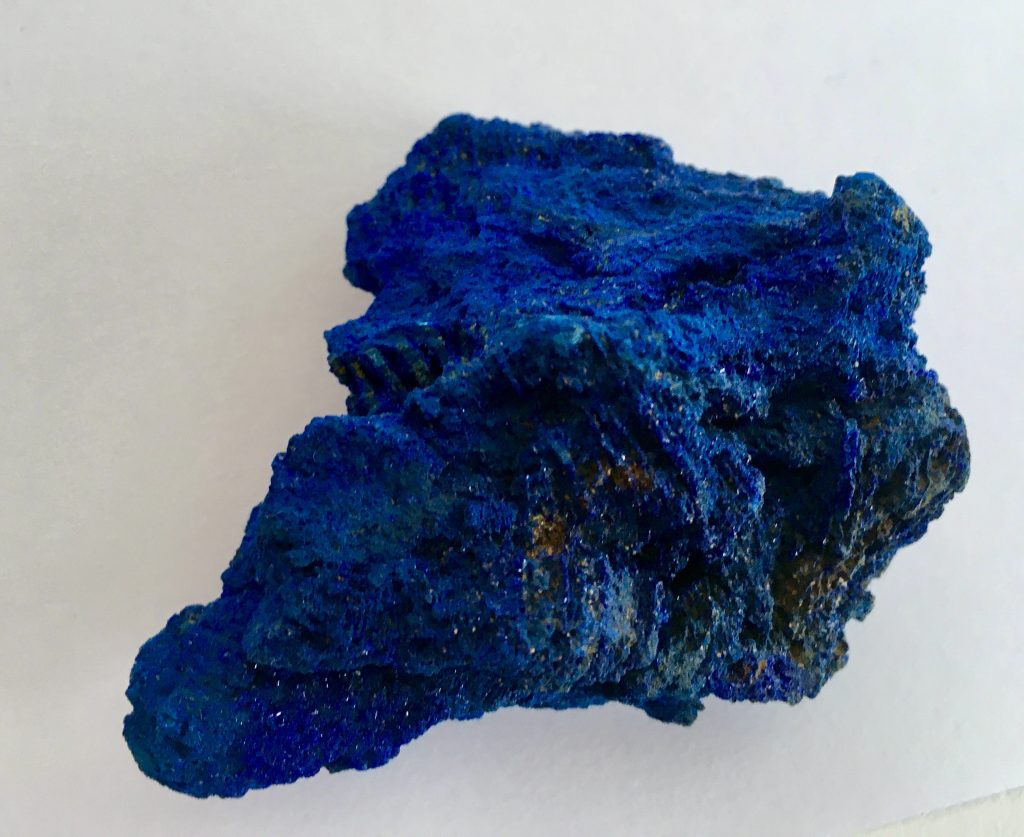
The ultramarine is a mineral pigment traditionally from Persia and Afghanistan. If you look at a chunk of lapis lazuli, you will see that the stone is not completely blue. It varies greatly, from deep dark blue to a grey blue with shimmering veins. We are talking about the blue mineral ‘lazurite’. Percentages run from about 25% to 40%. The rest consists of ‘calcite’ = white and ‘pyrite’ = shiny, looks a bit like gold and further ‘sodalite’.
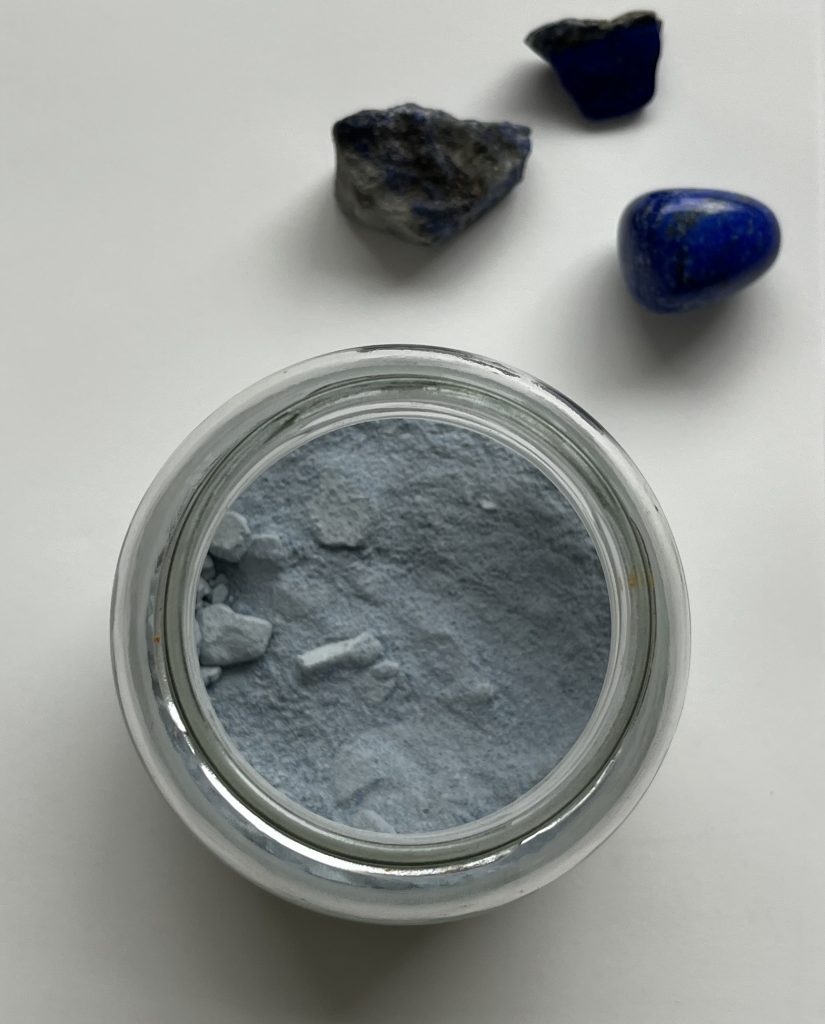
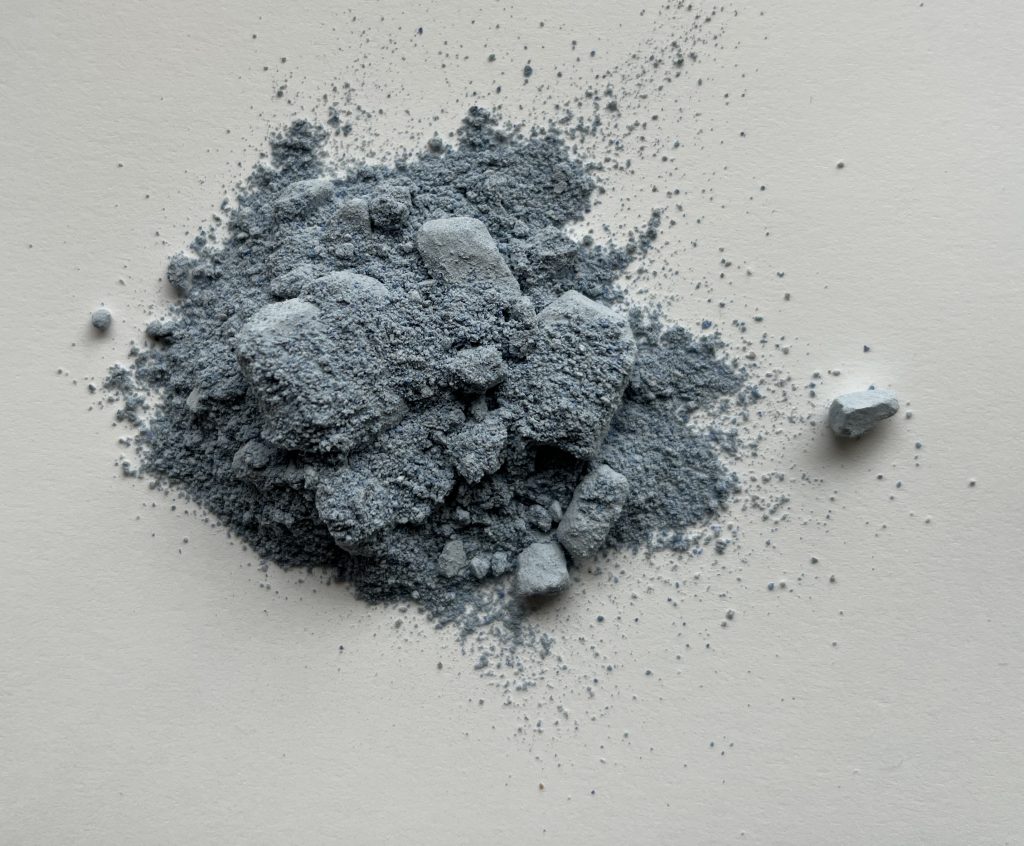
If you pulverize the stone you don’t get a nice bleu colour but a greyish pigment. From the 13th century onwards, a very laborious method was used to separate the blue from the non-blue particles.


Ultramarine blue was already used in Byzantine manuscripts from the 7th century and further in English manuscripts from the 8th century. However, it was not yet possible to make a pure blue pigment, so the pigment still contained many colorless materials. We see an improvement in the 11th and 12th centuries, and by the 13th century people were able to extract a beautiful blue pigment.
A well-known method of extracting the lazurite was described. by Cennino Cennini, Florentine artist (1360-1427). He wrote one of the most influential painting manuals of the late Middle Ages: “Il Libro d’el Arte. But on that extraction, we will pay attention in a following post.
In summary, we can say that ultramarine was an expensive pigment and its use an expression of opulence and luxury. It was applied only in the most lavishly executed manuscripts.

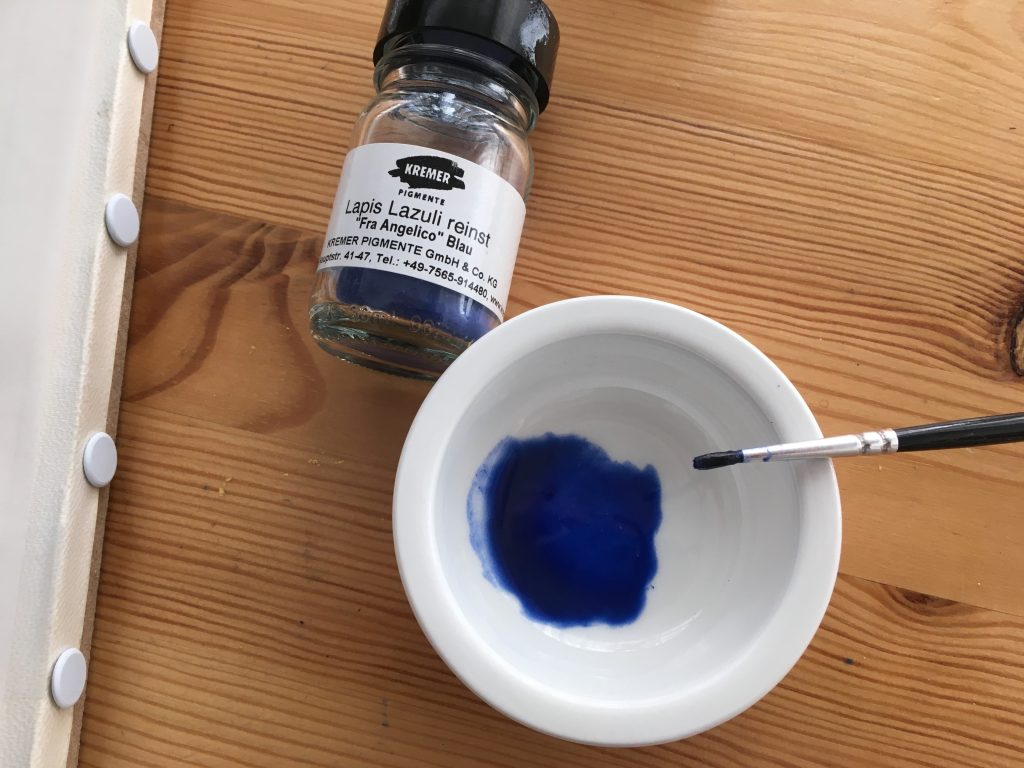
https://www.kremer-pigmente.com/en/shop/pigments/10530-lapis-lazuli-purest.html
Working with real ultramarine
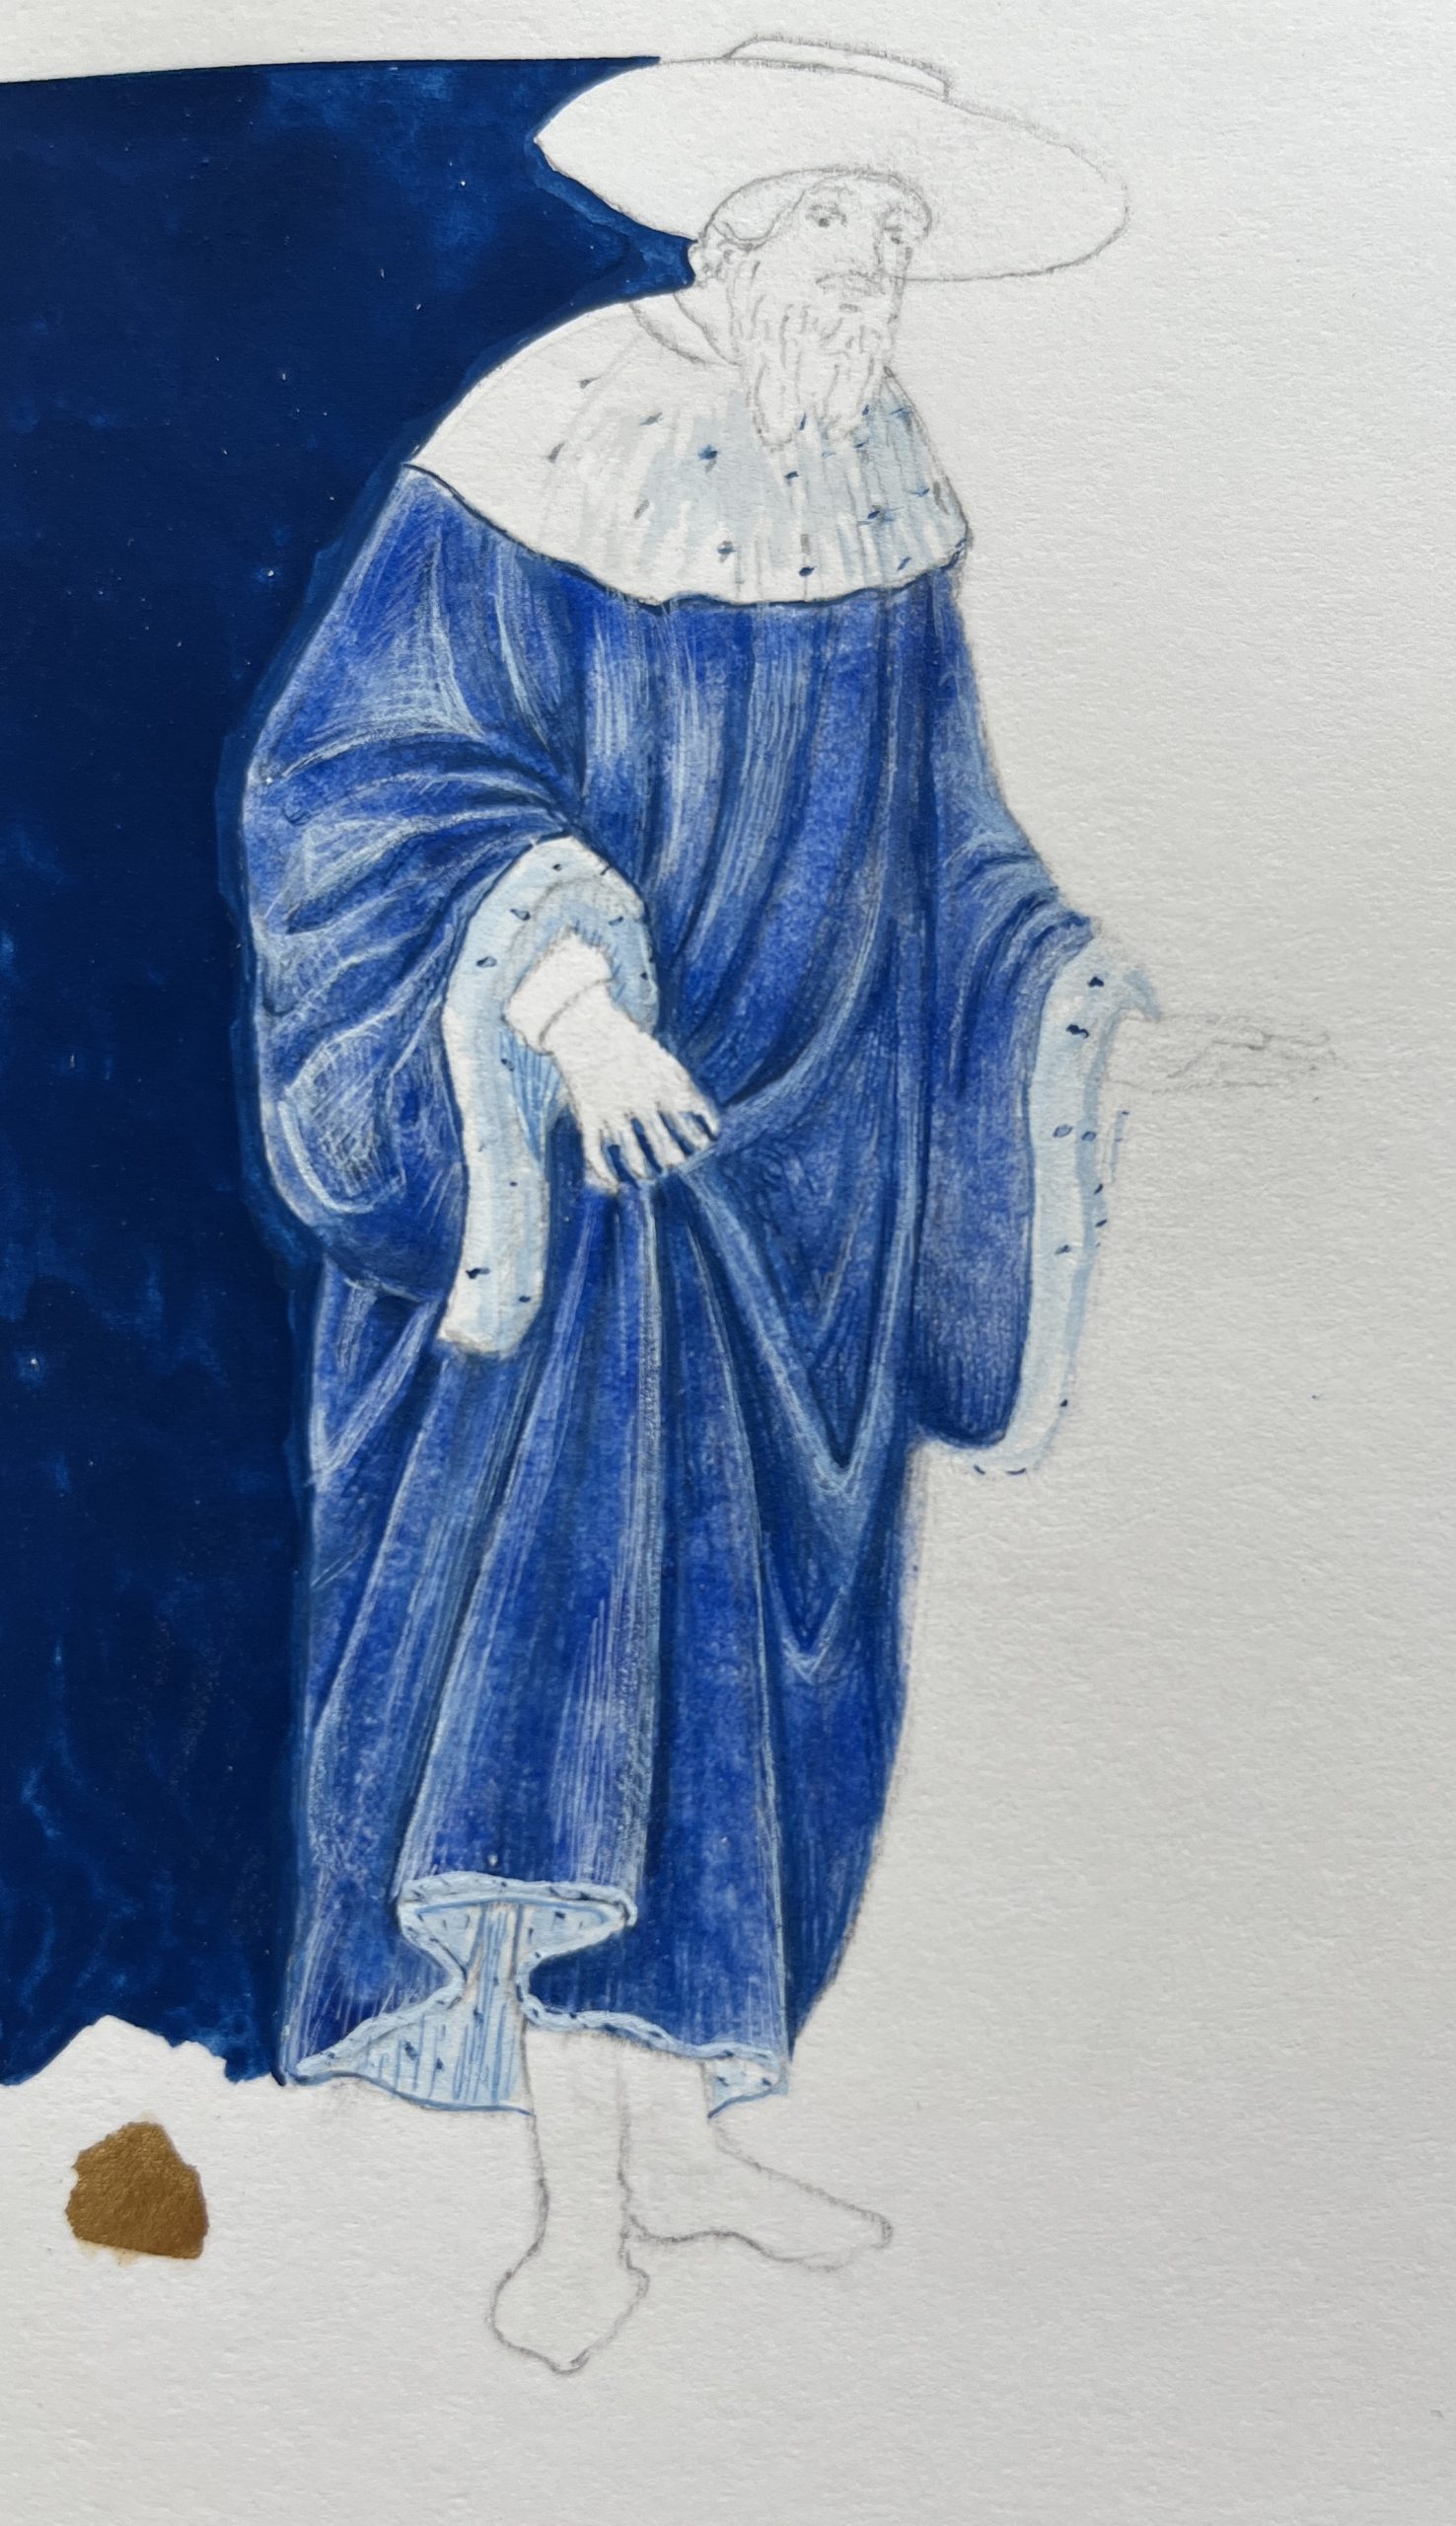
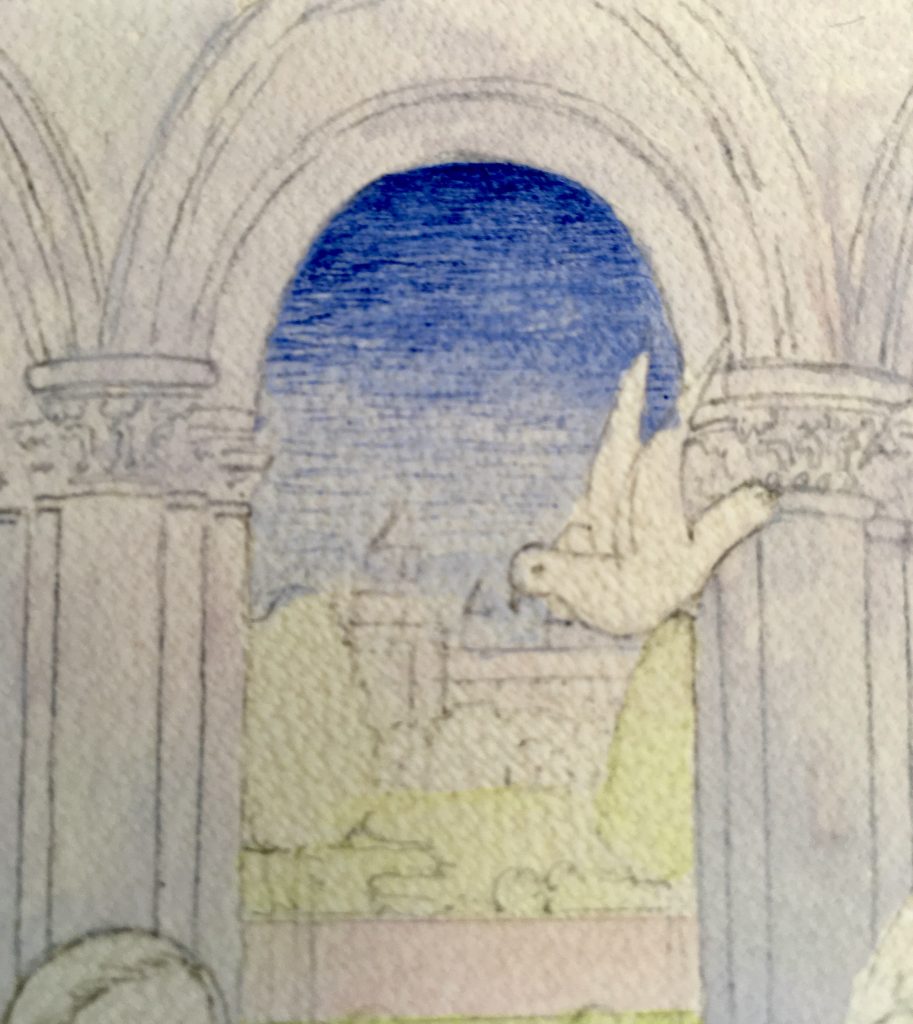
Below you can see a personal composition of the Annunciation, which is the announcement of the birth of Jesus by the angel to Mary. The border around the scene is based on the so-called: ‘spreading borders’ from the Ghent-Bruges style of the late Middle Ages. The fond of the border is painted with yellow ochre and dust gold. The work is painted on goat parchment. Both the cloak and sky are painted with the classic ultramarine.
We start by explaining how to paint the cloak with folds.

The annunciation, own composition. Painted on parchment with real ultramarine. In the margin, the background is made from ochre mixed with powdered gold.
How to paint with real ultramarine?

Here we see a cut-out and enlargement of the mantle. Actually, we see three stages of the outline.
On the left, we see the underdrawing made with thinned ink and shading on the shadow spots.
Then to the right of this we see a transparent, first layer of ultramarine. You have to work so ‘thin’ that you can still see the underdrawing.
On the far right, we see that another layer of ultramarine has been applied in the folds.
Not visible at this stage. You can now deepen the shadows with indigo.
N.B. Painting with ultramarine made from lapis lazuli is really quite different from painting with ultramarine from the tube. With the latter you can work immediately opaque but with traditional ultramarine you have to work in layers to get the colour more intense and opaque. This takes some practice because when you apply a second layer, you quickly take the undercoat with you.

We can now see that the cloak is painted with two layers where the folds go in, and with one layer where the folds come forward. So spatiality or plasticity is created by painting layers. Of course, we need to go further because the whole thing is still a bit ‘woody’. We can still work with indigo to darken the shadows and with white lines. We apply these nuances by shading with the colour over the layers already applied. You can see this below.

We can now see the darkening : ‘incidere’ and the raising : ‘matizare’.
The picture below shows the method of shading better. Incidentally, for this study of a mantle, the best quality ultramarine was used: Fra Angelico blue. Pay close attention to the subtle texture of the painting with the finest ultramarine.

By using a shading of white or dark lines, you can create nice smooth transitions and deep shadow patches, again indigo was used. Exercise painted with the the Fra Angelico blue the purest ultramarine.

Here we see an example of how to paint a sky with ultramarine.
Once again, you paint in layers and work out the details with shading. We start with a thin layer from top to bottom. At the top, it may already be slightly darker. Then we work out from the top with another layer until about the middle. Then we make a smooth transition with shading with ultramarine. Finally, we can add clouds with white.

Ultramarine blue made from lapis lazuli, was an expensive pigment used only in the most luxurious manuscripts. The pigment fell out of favour in the 19th century when a synthetic variant of ultramarine was invented by Jean Baptiste Guimet in 1826. The synthetic variant was much cheaper but slightly darker.
Below we see once more the three-step process


Binder for paint made from lapis lazuli pigment
Every pigment needs a binder to bind the pigment particles together to form a paint mass and allow it to bond with the surface.
The most common binder used in the early Middle Ages was clarified egg white or glair. A sediment from beaten egg white. Later, it was joined by gum Arabic and other gums from, for example, the cherry tree. For blue colors, they preferred to use size. Size or glue is made from pure collagen. ( Parchment glue and fish glue). The reason for this was that paint layers of the blues were relatively thick and needed a strong binder. I myself work with fish glue or a mixture of clarified egg white with gum Arabic.
Painting with real ultramarine was a special experience for me. Working with the special blue that played such an important role in the making of many wonderful miniatures has to be discovered. It works very differently from modern variants and nuancing the various shades does need practice. Painting in layers and shading over them is quite tricky. But is really fascinating to do.
I hope my experiences shared with you here will be become a source of inspiration for the real enthusiast. I am happy to share my experiences with anyone who feels the need. Who knows, another great workshop?