Vine black – Noir de vigne – Rebenschwarz
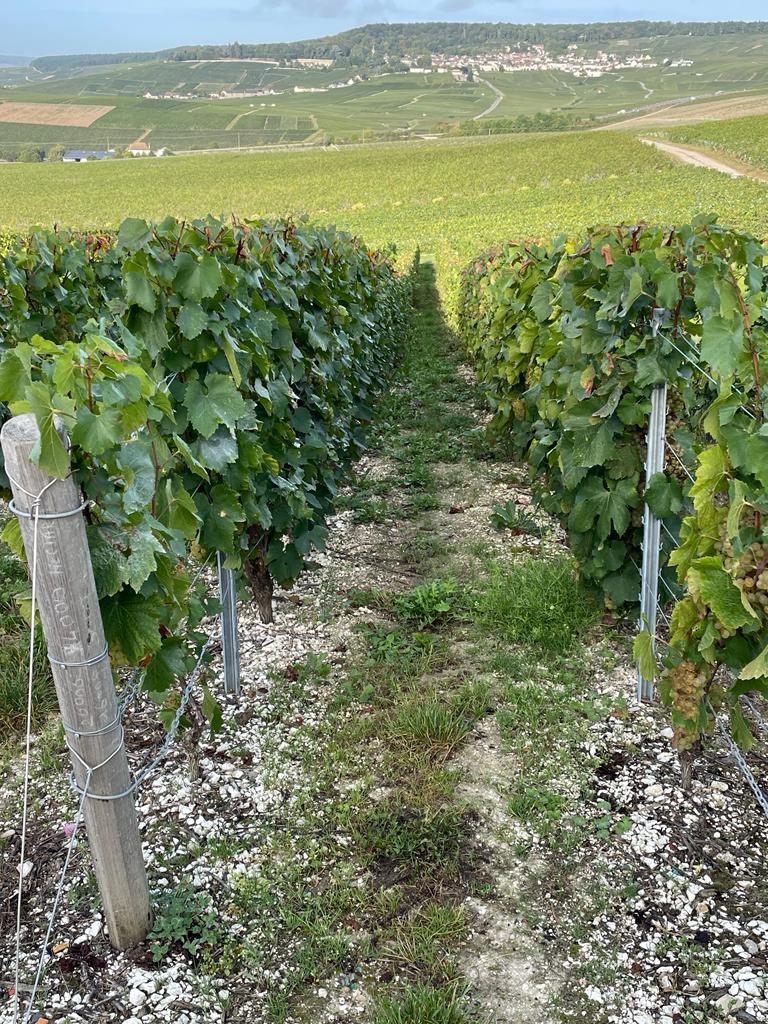
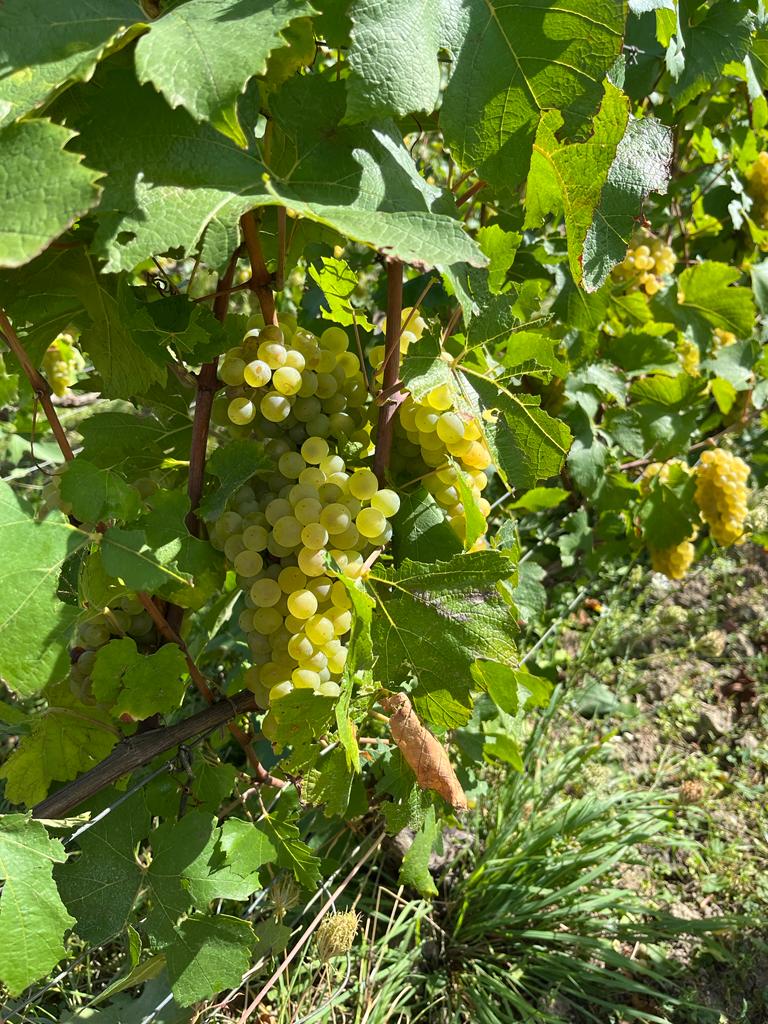
Wijngaarden in de Champagne streek, Frankrijk.
Vineyards in the Champagne region, France.
In een eerder bericht over Bourgondisch zwart schreef ik: “Naast inkt werden er in handschriften verschillende andere zwarten gebruikt zoals: Ivoorzwart, Lampzwart, Wijnranken zwart, Kersenpitten zwart, Druivenpitten zwart, Atramentum, Perzikenpitten zwart en Sepia. In het vervolg wil ik een aantal zwarten beschrijven die ik zelf in bezit heb en wat proefjes laten zien”.
In an earlier post on Burgundian black, I wrote: “Besides ink, several other blacks were used in manuscripts such as: Ivory black, Lamp black, Vine black, Cherry seed black, Grape seed black, Atramentum, Peach seed black and Sepia. In the following posts, I want to describe some blacks I own and show some samples”.
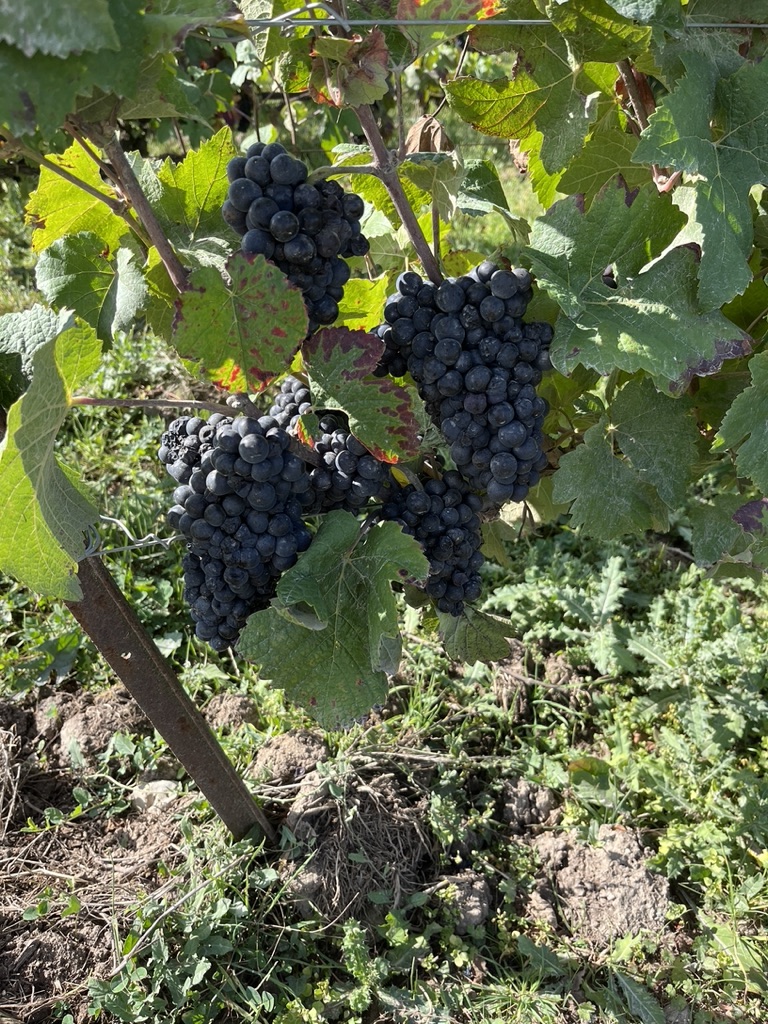
Young shoots of the vine from our own garden.
Deze keer wil ik het hebben over wijnranken zwart. (Nigrum optimum ex carbone vitis). Wijnranken zwart is afkomstig van verkoolde wijnranken, een organisch pigment dus, van pure koolstof. Het wordt al sinds de oudheid gebruikt en geeft een koud zwart met blauwachtige ondertonen. Dit blauwgrijs wordt bij menging met wit heel goed zichtbaar. Het is een zeer lichtechte, langzaam drogende kleur met een gemiddelde kleurkracht. Wijnranken zwart was al bekend in de prehistorie en werd ook veel gebruikt door middeleeuwse en renaissance kunstenaars. De term wijnranken zwart kan verwijzen naar houtskool van houtachtig materiaal van wijnstokken, maar is historisch ook wel toegepast op verkoold materiaal van andere oorsprong dan wijnranken. Wie nu wijnranken zwart koopt kan best een mengeling van diverse houtskool soorten kopen.
This time I want to talk about vine black.(Nigrum optimum ex carbone vitis). Vine black comes from charred vines, i.e. an organic pigment, from pure carbon. It has been used since ancient times and produces a cold black with bluish undertones. This blue-grey becomes very visible when mixed with white. It is a very lightfast, slow-drying colour with medium tinting strength. Vine black was already known in prehistoric times and was also widely used by medieval and Renaissance artists. The term vine black can refer to charcoal from woody material from vines, but has historically also been applied to charred material from sources other than vines. Those buying vines black now are best able to buy a mixture of various charcoal types.
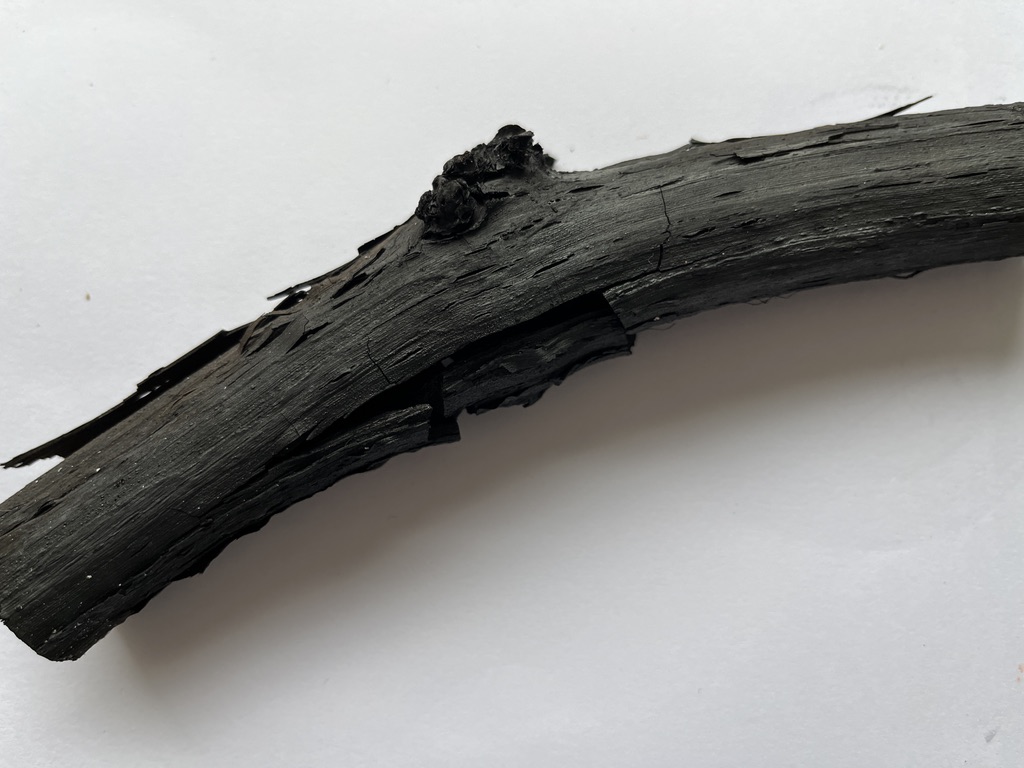
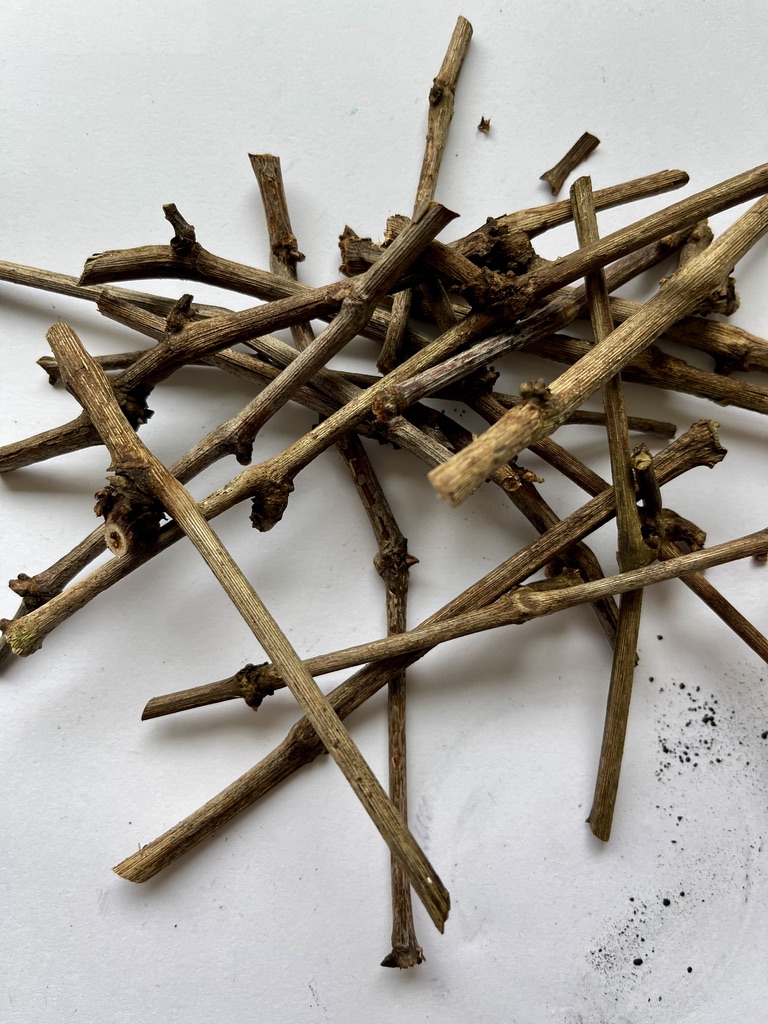
Completely charred piece of stem from our removed vine.
De reden waarom ik met het bespreken van wijnranken zwart begin is dat één van de twee druiven – wijnstokken in onze tuin het opgaf. Eerst verkleurden de blaadjes en in het volgende jaar niks geen heerlijke druiven meer. Jammer voor ons en voor de vogels. We maakten van de druiven geen wijn maar wel heerlijk druivensap, tenminste als er geen zwerm spreeuwen langskwam en in een luttel aantal minuten de hele druif leeg at. Maar nu de wijnstok moest echt de tuin uit en dat is nog wel een heel werk. Tijdens dat werk bedacht ik dat ik ook ter herinnering aan onze druif van de takken een mooi, historisch zwart pigment zou kunnen maken. Ik zocht wat dunne takjes uit en een aantal korte dikke stukken van de wijnstok en droogde die een tijdje. Het begint met het verkolen van de takken en dat is een precies werkje want voor je het weet zijn de takken verbrand en tot as geworden. Wanneer hout onder uitsluiting van lucht verhit wordt, verkoolt het tot houtskool. Het grootste deel van het hout verbrandt dan niet en de vluchtige bestanddelen verdampen. Er ontstaat nagenoeg zuivere koolstof en het voordeel van houtskool tegenover hout is dat men met hogere temperaturen kan stoken. Houtskool werd dan o.a. gebruikt voor ijzerproductie waarbij een temperatuur van 1200 graden Celsius moet worden bereikt, maar ook bij de productie van glas en keramiek.
The reason I start discussing vine black is that one of the two grape-vines in our garden gave up. First the leaves discoloured and in the next year no more delicious grapes. Too bad for us and for the birds. We didn’t make wine from the grapes but we did make delicious grape juice, at least when a swarm of sparrows didn’t come along and eat the whole of our grapes in a mere few minutes. But now the vine really had to get out of the garden and that is quite a job. During that work, it occurred to me that in memory of our grape I could also make a nice, historic black pigment from the branches. I picked out some thin twigs and some short thick pieces of vine and dried them for a while. It starts with charring the branches and that is a precise job because before you know it, the branches are burnt and turned to ash. When wood is heated under exclusion of air, it carbonises to charcoal. Most of the wood then does not burn and the volatile components evaporate. Virtually pure carbon is produced and the advantage of charcoal over wood is that one can fire at higher temperatures. Charcoal was then used, for example, for iron production requiring a temperature of 1200 degrees Celsius, as well as in the production of glass and ceramics.
Het beste zijn takken van één jaar oud die nog nauwelijks verhout zijn. Het zijn de scheuten die elk jaar systematisch van de wijnstokken worden gesnoeid, zij worden gebruikt voor de bereiding van het zwarte pigment. Al in de veertiende eeuw worden in het Liber diversarum arcium van Montpellier verkoolde wijnranken (Vitis) of wilgen (Salix) genoemd als favoriete grondstoffen voor de zwarte verf van verluchters. Ook vinden we recepten in de Arte Illuminandi en in het werk van Cennino Cennini: ‘Il Libro Dell ‘Arte.
The best are one-year-old branches that are still little wooded. These are the shoots that are systematically pruned from the vines every year; they are used to prepare the black pigment. As early as the 14th century, the Liber diversarum arcium of Montpellier mentions charred vines (Vitis) or willows (Salix) as favourite raw materials for the black paint of illuminators. We also find recipes in the Arte Illuminandi and in the work of Cennino Cennini: ‘Il Libro Dell ‘Arte.
)
“Een ander zwart wordt gemaakt van de ranken of jonge scheuten van de wijnstok, die verbrand moeten worden, na verbranding in water gegooid en uitgeblust en dan gemalen zoals andere zwarte pigmenten. Het is een kleur die zowel zwart als mager is; en het is een van de perfecte kleuren die we gebruiken en het is de beste” Pagina 76.
“Another black is made from the tendrils or young shoots of the vine, which must be burnt, thrown into water after burning and quenched and then ground like other black pigments. It is a colour that is both black and meagre; and it is one of the perfect colours we use and it is the best” Page 76.
Als de houtskool op een voldoende hoge temperatuur is verbrand, is er geen twijfel over de duurzaamheid ervan als pigment in alle media. Als het echter niet goed verkoold is, kan het grijs worden na lange blootstelling aan licht. Deze verandering is te wijten aan de oxidatie van de vluchtige bestanddelen, bruine stoffen die qua samenstelling het midden houden tussen het oorspronkelijke plantaardige materiaal en koolstof.
If charcoal has been burnt at a sufficiently high temperature, there is no doubt about its durability as a pigment in all media. However, if it is not charred properly, it may turn grey after long exposure to light. This change is due to the oxidation of the volatile components, brown substances that are intermediate in composition between the original plant material and carbon.
Doordat houtskool zwart afgeeft en dan aan de ondergrond zich bindt, leent het zich ook voor artistieke doeleinden zoals tekenen. Deze houtskool werd in vroegere bronnen aangeduid als nigrum optimum, ‘het beste zwart’. Latere bronnen bevelen ook verkoold wilgenhout aan. Tekenstiften gemaakt van verkoolde twijgen van wijnrank of wilg behoren dan ook tot de gemiddelde gereedschapskist van vijftiende-eeuwse kunstenaars, en zijn perfecte gereedschappen voor tekenen en ondertekenen. Bewaar zelf ook goede herinneringen aan mijn academietijd waar we volop met houtskool tekenden. Het is een heerlijk tekenmateriaal tenminste als het goed is verkoold en er geen harde pitjes meer inzitten. De beste toen verkrijgbaar, waren de houtskool staafjes gemaakt van wilgenhout.
Because charcoal gives off black and then binds to the surface, it also lends itself to artistic purposes such as drawing. This charcoal was referred to in earlier sources as nigrum optimum, ’the best black’. Later sources also recommended charred willow wood. Drawing sticks made from charred twigs of vine or willow were therefore part of the average toolbox of fifteenth-century artists, and perfect tools for drawing and underdrawing. Keep good memories myself of my academy days where we drew abundantly with charcoal. It is a wonderful drawing material at least when it is well charred and has no hard pits left. The best available then were charcoal sticks made of willow.
Zelf heb ik gemerkt waarom men juist de jonge nog niet zo harde scheuten van de wijnstok neemt voor het verkolingsproces in plaats van de dikkere takjes of de stam. Er is een significant verschil tussen de houtskool van deze dunne takjes en bijvoorbeeld die gemaakt is van de stam. De jonge scheuten geven een heel fijne koolstof die zich veel gemakkelijker laat verwerken op de steen. Bij de uitleg van het proces kom ik daarop terug.
I myself have noticed why people take precisely the young not yet hard shoots of the vine for the charring process instead of the thicker twigs or the trunk. There is a significant difference between the charcoal from these thin twigs and, for example, that made from the stem. The young shoots give a very fine carbon that is much easier to process on the stone. I will come back to this when explaining the process.
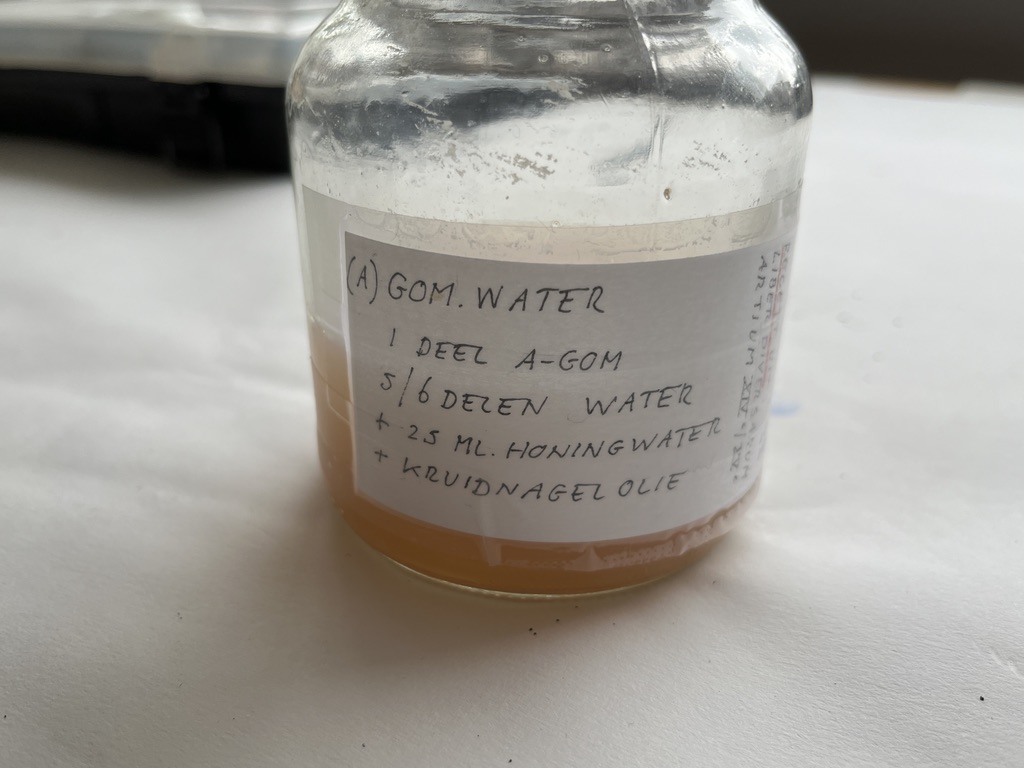
Het bindmiddel is ook wel van belang heb ik gemerkt bij de proeven. Standaard maak ik gebruik van een mix van Arabische gom en geklaard eiwit met wat honing. Bij de eerste proef met de dikke tak houtskool bleek de verflaag toch nog iets af te geven. Bij de tweede proef heb ik een Arabische gom-oplossing gebruikt met honing en dat werkte heel goed.
The binder also does matter I have noticed in the trials. As standard, I use a mix of gum arabic and clarified egg white with some honey. In the first test with the thick branch of charcoal, the paint layer still appeared to give off slightly. In the second trial, I used gum arabic solution with honey and that worked very well.
Mogelijke redenen:
- Was de koolstof niet fijn genoeg vermalen?
- Wat het bindmiddel niet goed gedispergeerd?
Potential reasons:
Was the carbon not ground fine enough?
What the binder did not disperse properly?
Werkwijze
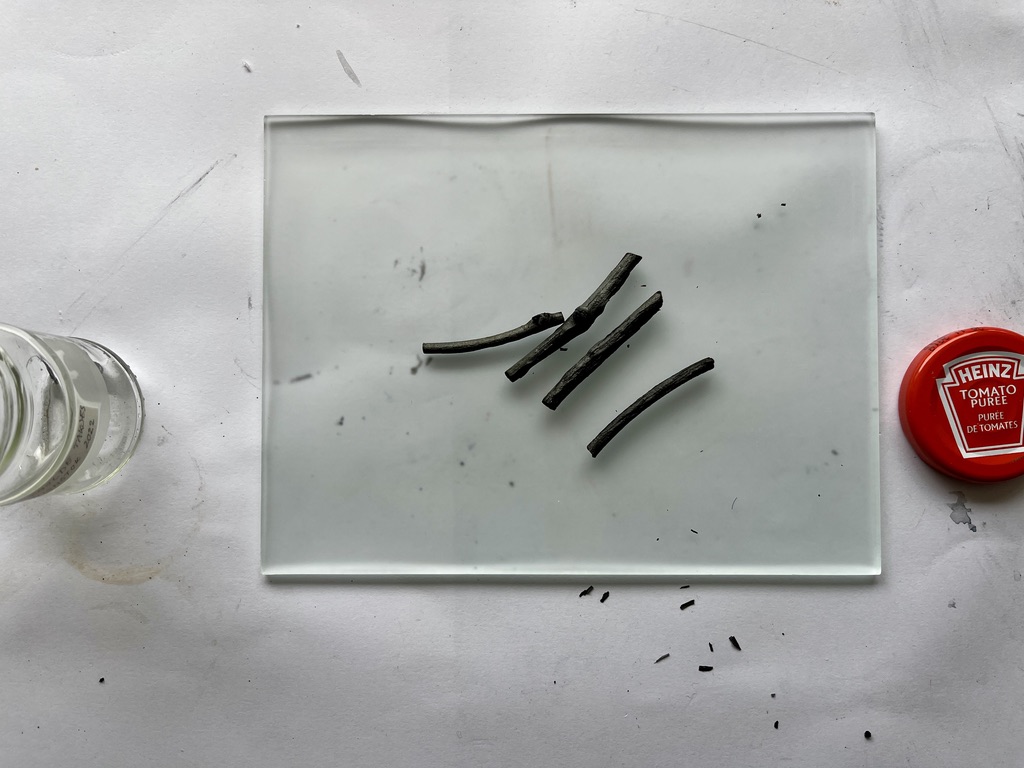
Voor de twee proeven heb ik dunne takjes gebruikt van onze gezonde wijnstok en daarnaast takjes en een stukje van de dikke stam van de uit de tuin verwijderde wijnstok. Hieronder een beschrijving met beeldmateriaal. De gemaakte verf ga ik gebruiken voor het maken van een grisaille schildering.
Work method
Work method
For the two trials, I used thin twigs from our healthy vine and, in addition, twigs and a piece of the thick trunk of the vine removed from the garden. Below is a description with pictures. I will use the paint I made for making a grisaille painting.
Cennino Cennini schrijft dat je de jonge takken in het vuur moet gooien, ze moeten worden verbrand om daarna overgoten te worden met water. Als je deze beschrijving naar de letter volgt zal een groot gedeelte van de takken gewoon verbranden denk ik. Hoeveel takken moeten er worden gebruikt om nog wat over te houden? Wanneer moet je stoppen, hoe heet moet het vuur zijn, moet het nog branden of alleen nog nagloeien? Het idee is wel duidelijk maar de uitvoering niet echt.
Cennino Cennini writes that you should throw the young branches into the fire, they should be burnt and then doused with water. If you follow this description to the letter much of the branches will just burn I think. How many branches should be used to have some left? When to stop, how hot should the fire be, should it still burn or just glow? The idea is clear but the execution not really.
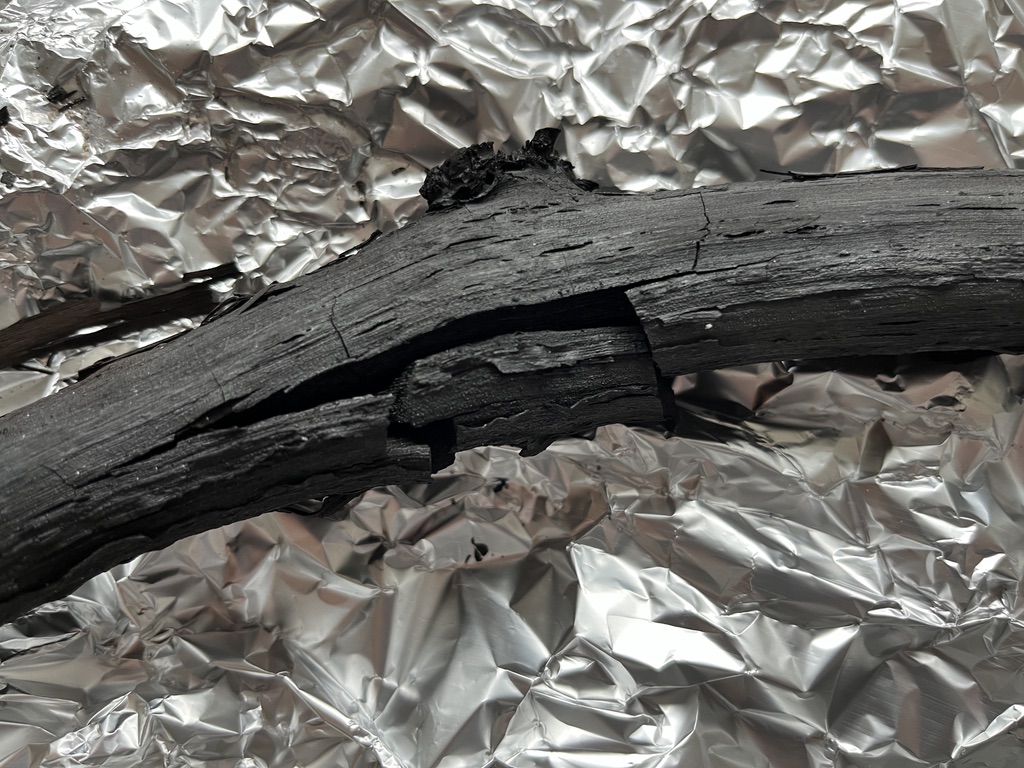
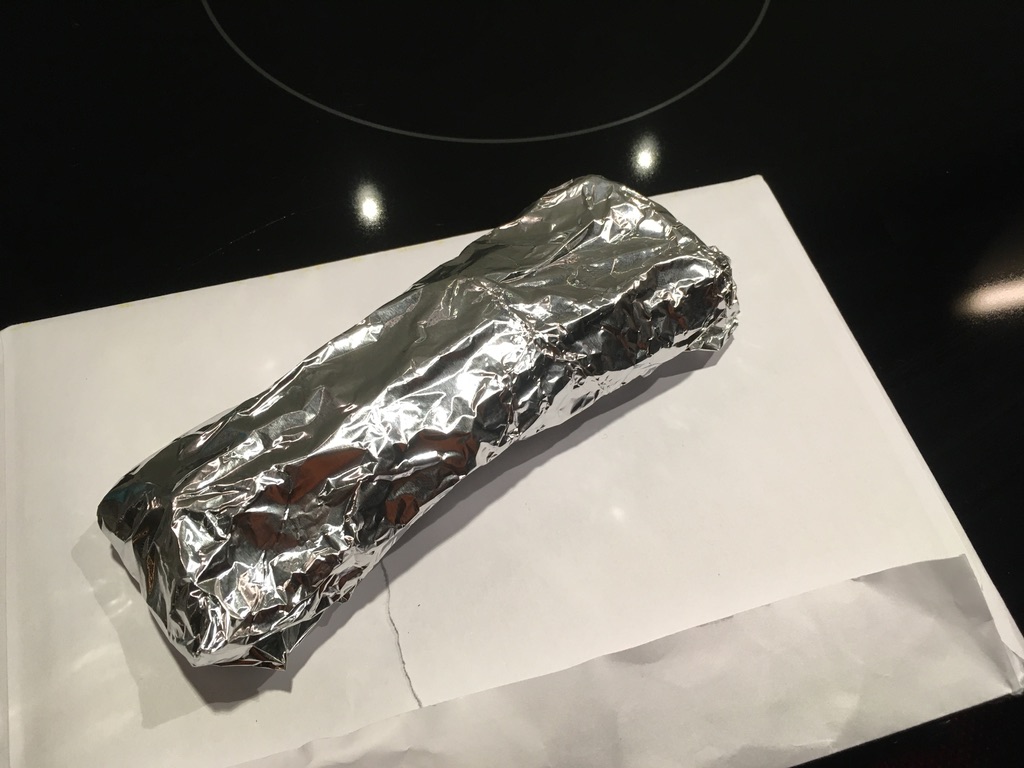
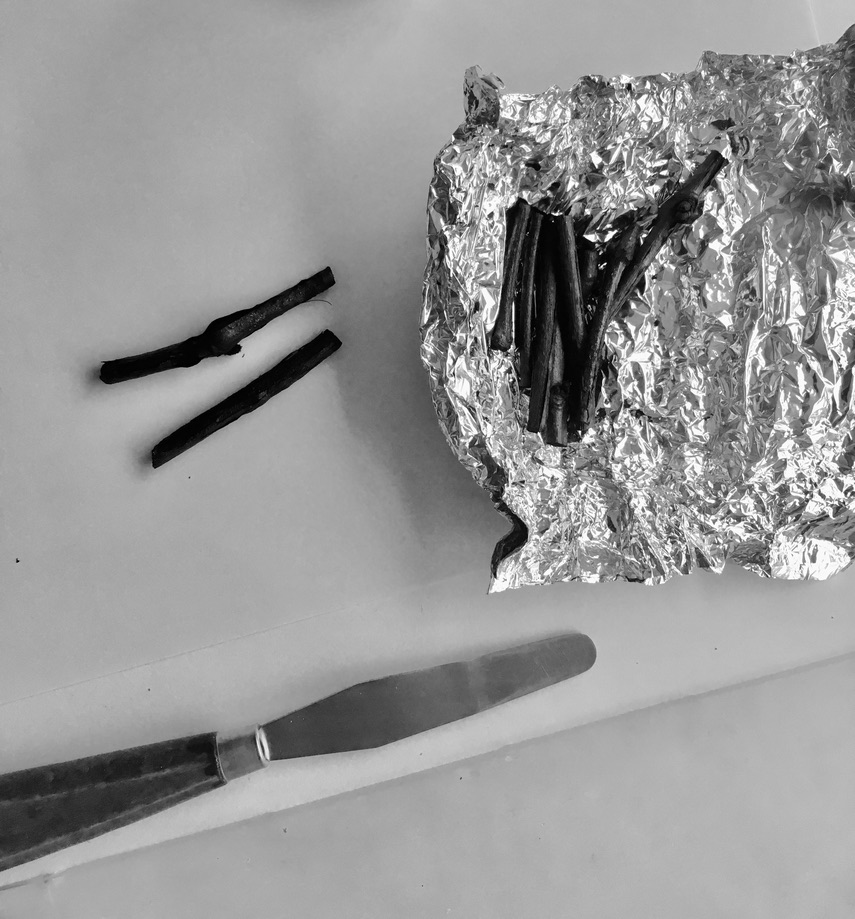
Zelf heb ik gebruik gemaakt van onze houtkachel. De takjes heb ik zorgvuldig maar losjes omhuld met aluminiumfolie. Niet één laag maar meerdere en wel zo dat er nauwelijks of geen zuurstof bij kan komen. Dit is heel belangrijk anders verbranden de takjes en dat gebeurde me de eerste keer dat ik het probeerde. Als de houtkachel s’ avonds uitgebrand was legde ik de bundeltjes in de gloeiende asresten. Niet in het vuur anders verbranden ze toch is me gebleken. De volgende morgen had ik perfecte houtskool staafjes van jonge wijnrankscheuten. Mooi zacht materiaal dat goed is te verpulveren.
I I myself used our wood-burning stove. I carefully but loosely wrapped the twigs in aluminium foil. Not just one layer but several and in such a way that little or no oxygen can get in. This is very important otherwise the twigs will burn and that happened to me the first time I tried it. When the wood stove burned out in the evening, I put the bundles in the glowing ashes. Not in the fire otherwise they would burn anyway I found out. The next morning I had perfect charcoal sticks made from young vineyard shoots. Nice soft material that pulverises well.
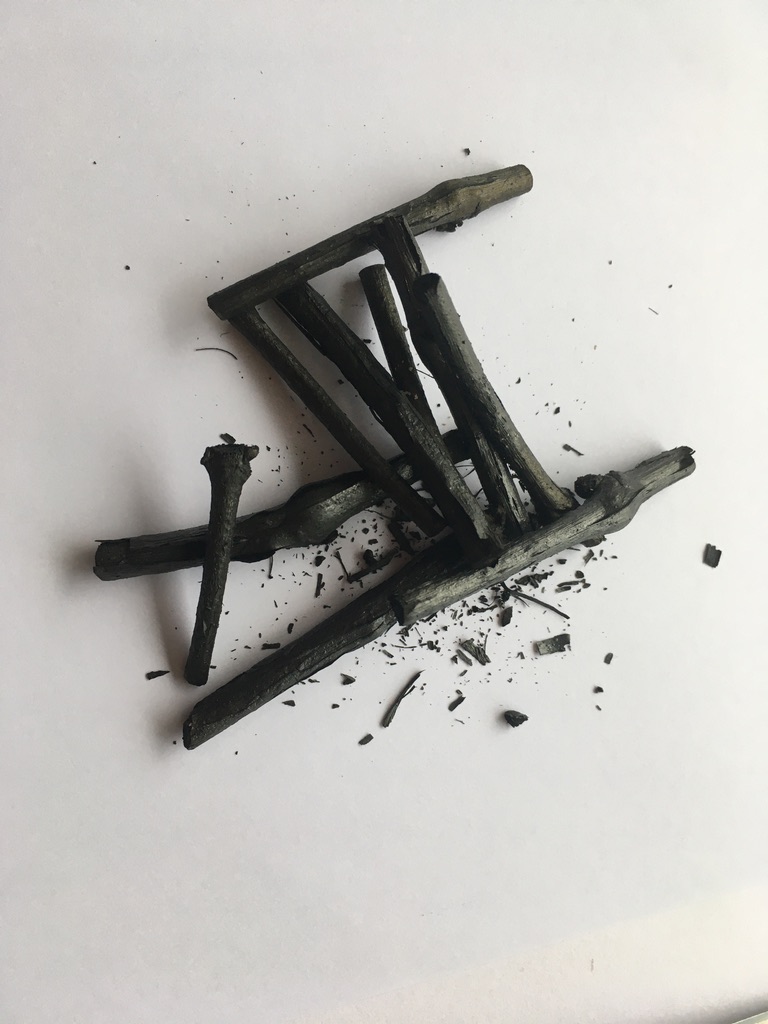
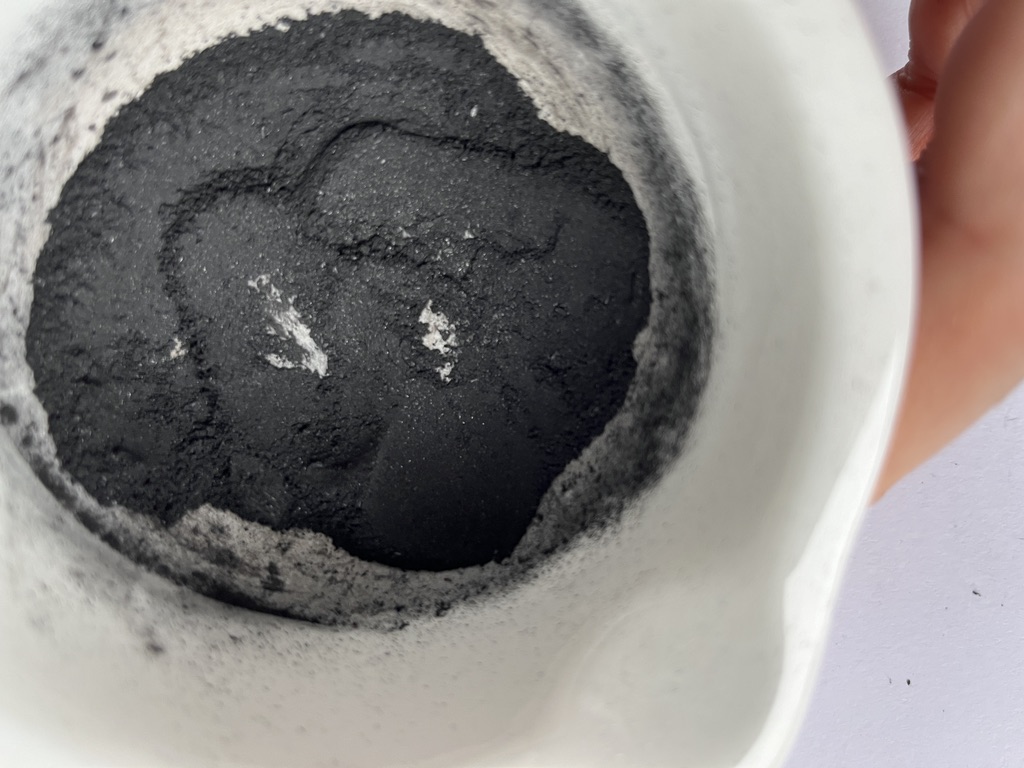
Vervolgens maken we de takjes fijn in een vijzel en daarna op de plaat. Goed verpulveren is belangrijk maar eigenlijk is het materiaal, als het goed is verkoold heel zacht.
Next, we crush the twigs in a mortar and then on the plate. Pulverising well is important but actually, when charred properly, the material is very soft.
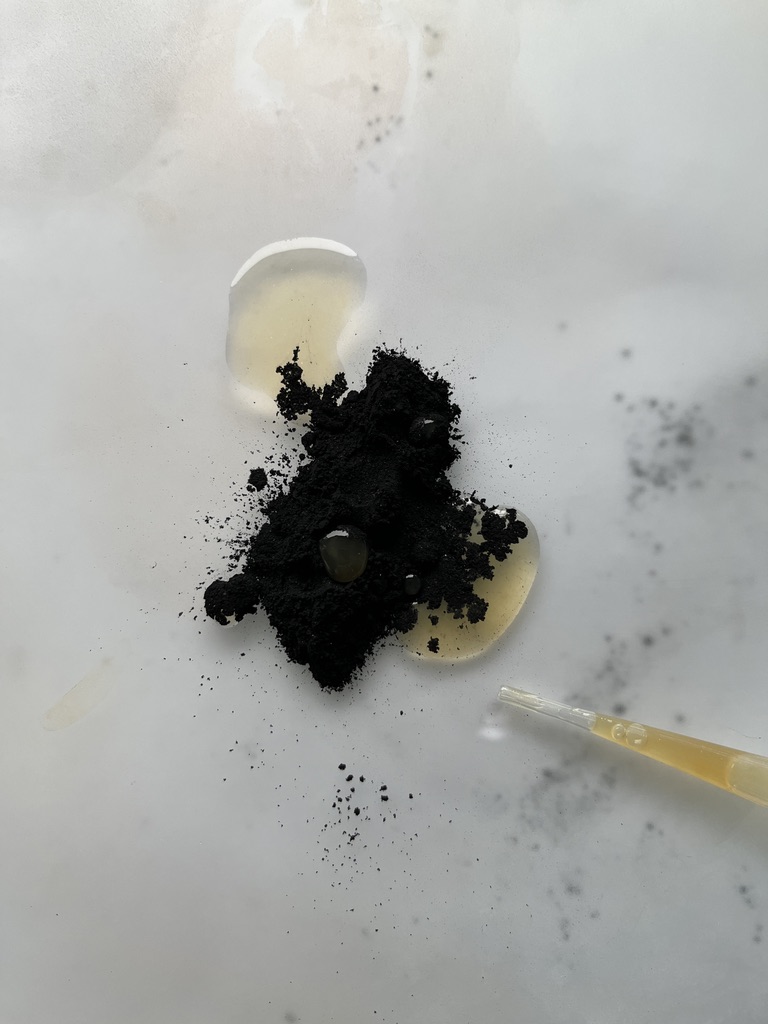
Dan gaan we bindmiddel toevoegen en daarbij moeten we opletten. In de eerste plaats is het soms lastig om dit te doen, het bindmiddel wil zich dan niet zo goed verspreiden in de koolstofmassa. Een paar druppels alcohol doen wonderen. Over het bindmiddel zelf, ik heb een voorkeur voor Arabische gom met een beetje honing.
Maak altijd een paar proefjes. Maak een verloop van dun naar heel waterig, meng het eens met wat wit tot grijs etc. Na droging controleren of het goed hecht allemaal.
Het maken van een koolstofzwart is eigenlijk niet moeilijk en geeft veel voldoening wanneer je van een eenvoudig natuurlijk materiaal zelf je verf maakt.
Then we start adding a binder and here we have to be careful. First of all, it is sometimes difficult to do this, the binder does not want to spread very well in the carbon mass. A few drops of alcohol do wonders or (Ox gall).About the binder itself, I prefer gum arabic with a little honey.
Always make a few trials. Make a progression from thin to very watery, mix it once with some white to grey etc. After drying, check if it adheres well all together.
Making a carbon black is actually not difficult and is very satisfying when you make your own paint from a simple natural material.
Hieronder een beschrijving om zelf wijnranken zwart te maken..
Below is a description to make your own vines black….
Stap 1.
Wikkel de jonge takjes in aluminiumfolie en leg ze daarna in het nagenoeg gedoofde vuur.
Wrap the young sprigs in aluminium foil and then place them in the almost extinguished fire.
Stap 2.
Laat het een nacht in de dovende haard liggen en open de volgende morgen de folie heel voorzichtig.
Leave it overnight in the quenching fireplace and very carefully open the foil the next morning.
Stap 3.
Doe de takjes in een vijzel en stamp de takjes compleet tot poeder.
Put the sprigs in a mortar and pound the sprigs completely to powder.

Stap 4.
Breng het poeder op de steen of glazen plaat en voeg er bindmiddel aan toe.
Apply the powder to the stone or glass plate and add binder.
.
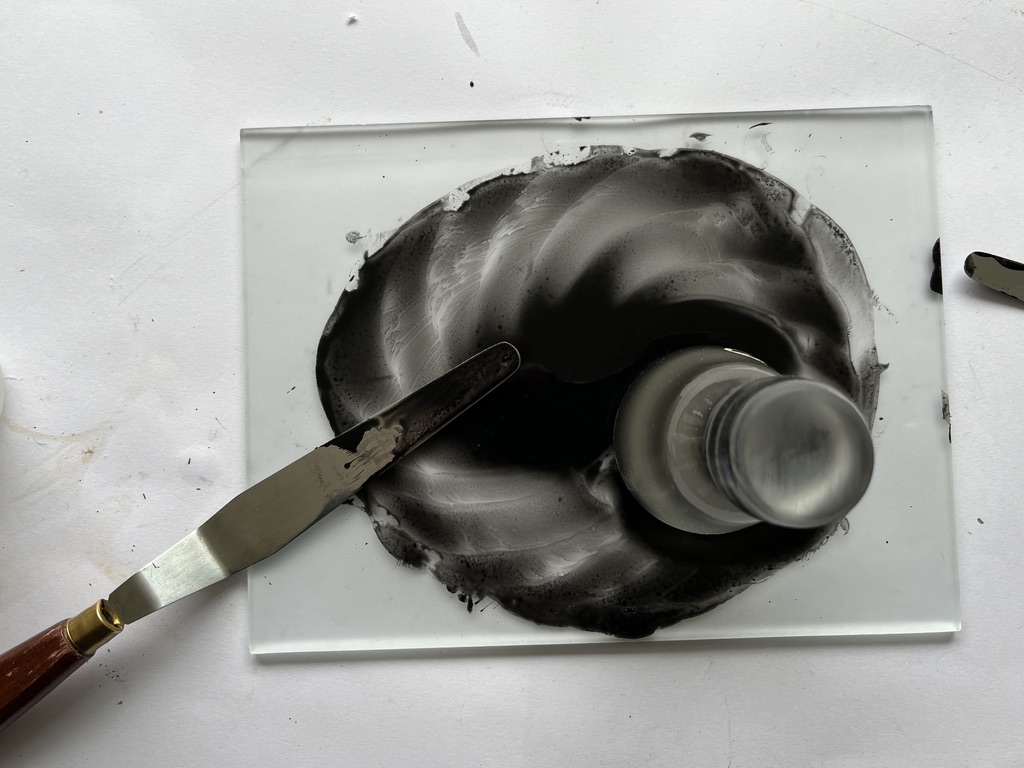
Stap 5.
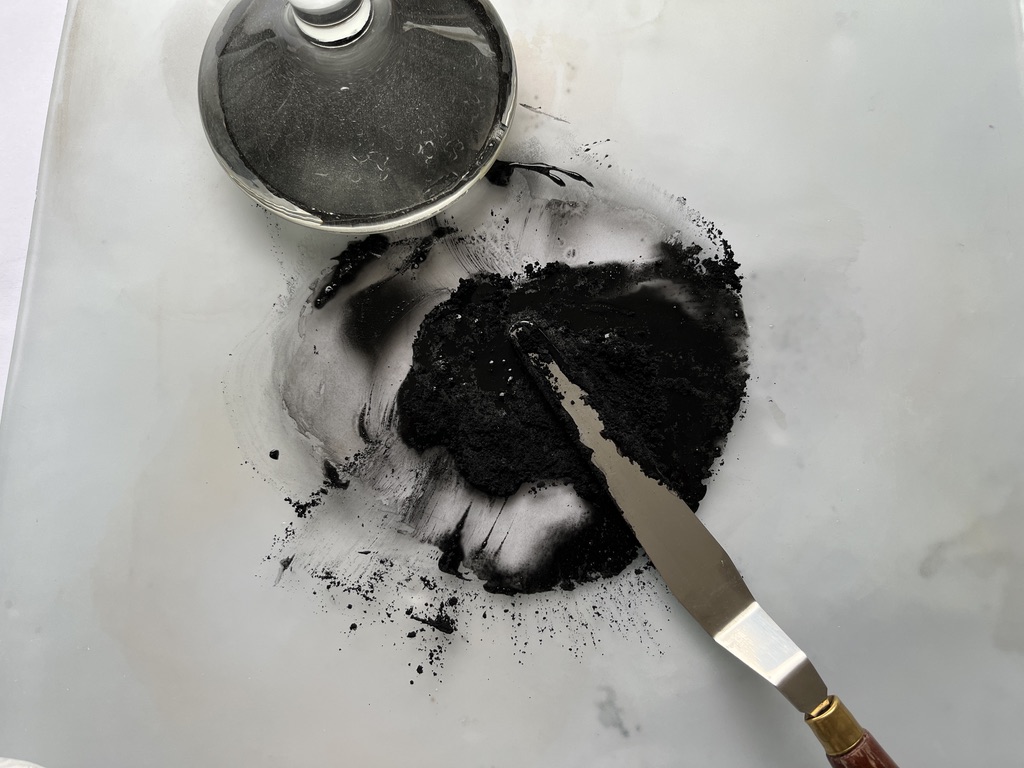
Ga nu met een glazen loper aan het werk om het bindmiddel compleet door de massa te werken.
Now go to work with a glass muller to work the binder completely through the mass.
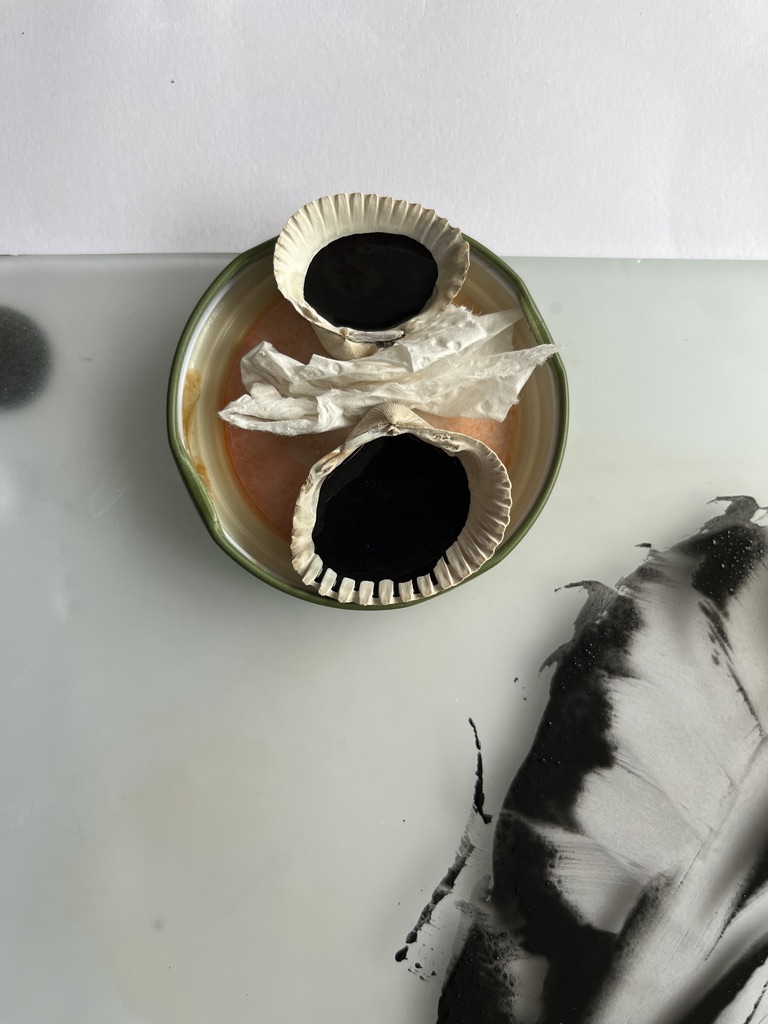
Stap 6.
Doe de verf nu in schelpjes en laat ze drogen. De gedroogde verf kunnen we later weer bevochtigen met water en vervolgens gewoon schilderen.
Now put the paint into shells and let them dry. We can later re-moisten the dried paint with water and then just paint.
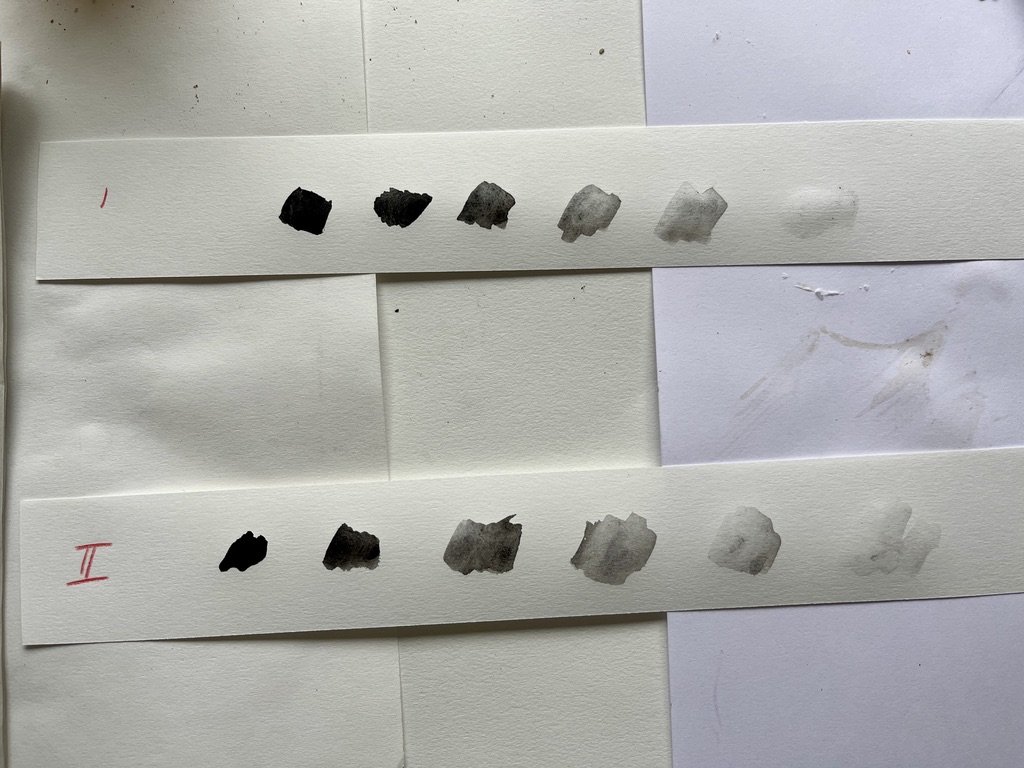
Stap 7.
Maak proeven met diverse diktes van de verf. Eventueel nog wat bindmiddel gebruiken.
Make trials with various thicknesses of paint. If necessary, use some more binder.
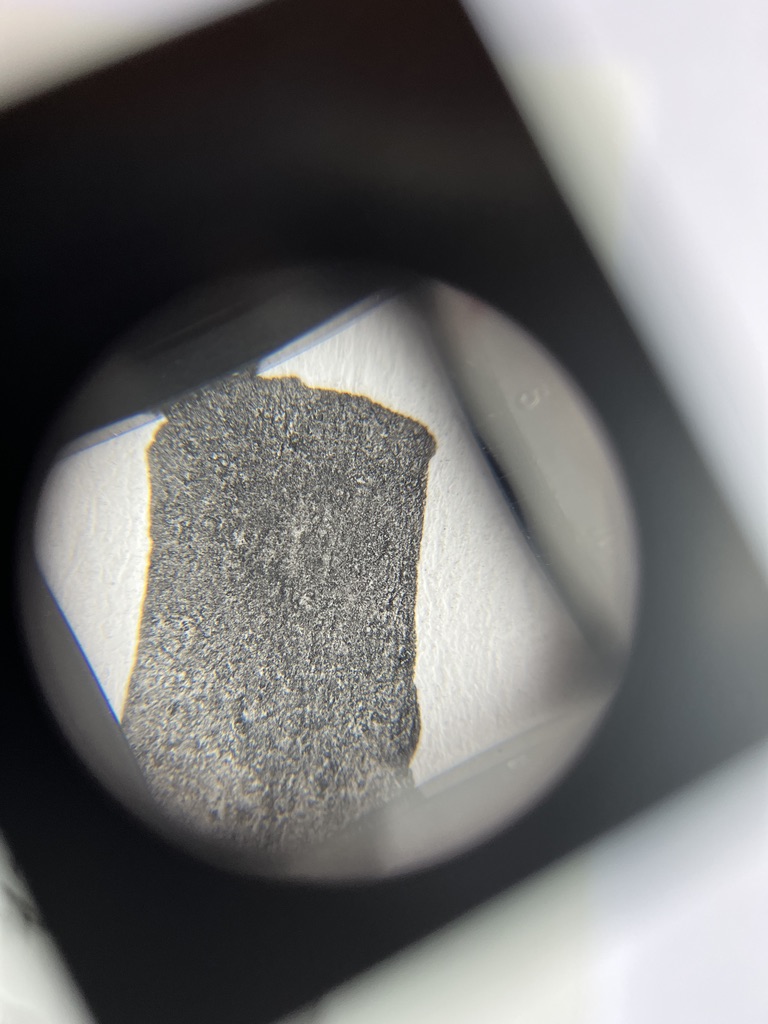
The painted layer magnified 10 times. You can see the grains of carbon.